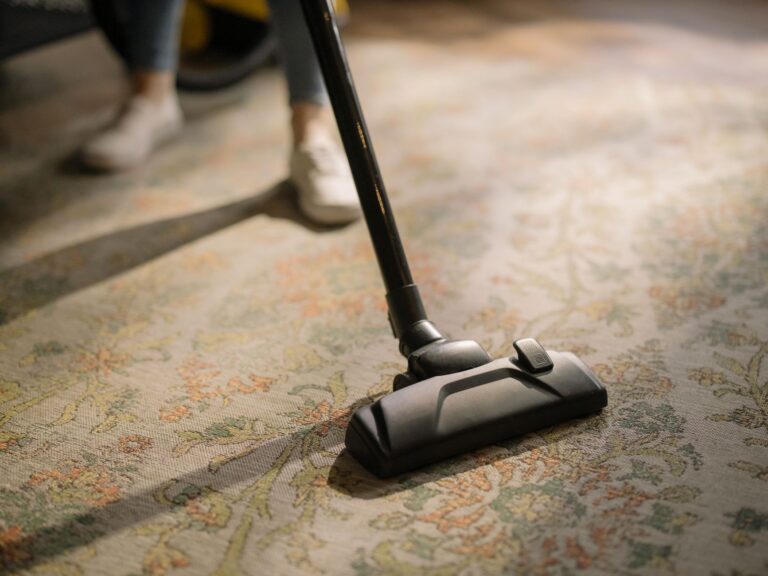


Hidden carpet spots reveal colorfastness through a simple cloth-rub test, starting with a dry white rag, then plain water, your actual cleaning solution, and 140°F water, each blotted with a fresh cloth and left to sit for ten to fifteen minutes. Any color transfer on the cloth signals that dye will bleed during a full cleaning, so you can match the result to a safer method or call a pro before damage sets in.
This guide covers four simple colorfastness tests homeowners can run on a hidden carpet spot before any wet cleaning, walking through fiber identification, supplies, each test method, and how to read the results.
Why Colorfastness Testing Protects Your Carpet Investment
Dyes in carpet yarn are bonded to fibers with varying strength, and water, heat, pH shifts, and friction can break those bonds. When bonds fail, color migrates: it bleeds into adjacent fibers or transfers onto anything that touches it. Crocking, the slow release of surface dye from dry rubbing, is the everyday version of the same chemistry in action.
Once dye has bled into a carpet and dried, the discoloration is essentially permanent. Bleed-out rarely reverses, and a full re-dyeing or replacement often becomes the only realistic fix. Pre-testing is the standard precaution endorsed by the Carpet and Rug Institute (CRI), the Institute of Inspection, Cleaning and Restoration Certification (IICRC), and the American Association of Textile Chemists and Colorists (AATCC), all of whom recommend a documented pre-test on every cleaning job for exactly this reason.
A fiber-safe cleaner on a stable dye is a non-event. A fiber-safe cleaner on an unstable dye can turn a normal Tuesday into a warranty claim.
Identifying Your Carpet Fiber and Its Bleeding Risk
Fiber type is the single biggest predictor of dye stability, so the first thirty seconds of any test should be spent identifying what is actually in the pile. Check the care label tucked under a corner, the original sales receipt, or clip a single fiber for a burn test before you touch a cloth to the surface.
Wool and silk sit at the high-risk end because their dye sites react sharply to pH changes, and silk loses color rapidly under acidic spot removers or hot water. Nylon is generally stable, but piece-dyed nylons (where the dye bath colors the finished yarn) still release under aggressive alkaline cleaners. Polyester and olefin fall in the middle, with solution-dyed versions sitting at the most stable end of the spectrum because the pigment is locked into the fiber itself rather than coated on the outside.
Quick Fiber Risk Comparison
| Fiber Type | Dye Process | Bleeding Risk | Notes |
|---|---|---|---|
| Wool | Acid or chrome dyes | High | pH-sensitive; avoid acids and high alkalinity |
| Silk | Acid or reactive dyes | High | Use only WoolSafe-approved products |
| Nylon (piece-dyed) | Bath-dyed | Moderate | Stable with neutral cleaners, risky with alkalies |
| Polyester | Bath-dyed or solution-dyed | Low to moderate | Solution-dyed variants rarely bleed |
| Olefin (polypropylene) | Solution-dyed | Very low | Color locked into the fiber itself |
| Wool/synthetic blends | Mixed | High | Test at the blend’s weakest fiber |
If you cannot identify the fiber, default to the strictest testing protocol. The worst-case outcome is mild over-caution, while the worst-case dye bleed is a permanent reminder that guessing is expensive.
Gathering Supplies and Choosing the Right Test Location
Three items cover every test: a clean white cotton cloth or plain white paper towel, a small cup of lukewarm water, and the actual cleaning product you plan to use. Plain white matters, because any print, dye, or optical brightener on the cloth will contaminate the result and trick you into thinking your carpet bled.
Pick a hidden area for the test, somewhere foot traffic, sunlight, and pets rarely reach. The back of a closet, the floor under a heavy sofa, or a corner behind a door works well. Avoid spots with obvious sun fade, since those fibers have already released some dye and will skew your reading toward the alarmist side.
Check the Manufacturer’s Care Label First
Most carpet care labels hide along the back edge or underneath a corner, often tucked into a seam or printed on a small fabric strip. The label, warranty card, or original paperwork will name approved cleaners, water temperature limits, and recommended methods. Most CRI-certified warranties specifically require pre-testing with a documented result, so skipping this step is the fastest path to a voided claim.
Performing the Four Pre-Cleaning Colorfastness Tests
Run all four tests in sequence, in the same hidden spot, and wait the full reaction time on each one. Skipping a test to save five minutes is the most common mistake that leads to permanent damage. Total time across all four is under fifteen minutes, and the supplies cost less than a dollar.
Rub Test for Crocking
Press a dry white cloth firmly against the carpet and rub in a small circular motion about ten times with steady pressure. Crocking shows up as faint color on the cloth even before any wet product is applied, and it warns you that dry vacuuming and brushing can release dye onto socks, shoes, and furniture.
Water Spot Test
Apply a few drops of plain lukewarm water to a small area, wait ten to fifteen minutes, then blot firmly with a fresh white cloth. A clean cloth means the water alone is safe. A tinted cloth means the water is the problem, and you should plan around dry cleaning methods or lower-moisture techniques like encapsulation.
Cleaning Solution Spot Test
Dose a few drops of the actual product you plan to use, at the same concentration and the same dwell time as the real cleaning. After ten to fifteen minutes, blot and compare the cloth to one from the plain water test. A darker tint here tells you the cleaner itself is triggering release, even when water is innocent, and you should switch to a pH-neutral or WoolSafe-approved formula before touching the rest of the room.
Hot Versus Cold Water Comparison
Repeat the water test on an adjacent hidden spot using water heated to around 140°F, the same temperature a hot-water extraction unit typically delivers. Many dyes stay locked at lukewarm temperatures and let go at higher heat, which is exactly the condition a steam cleaner or hot-water extraction machine creates. This comparison catches the most common professional-cleaning mistake, where the equipment itself is safe but the temperature is not.
Reading the Results and Choosing Your Next Move
Interpretation is the part most pre-test guides gloss over, and it is where real decisions get made. Compare each cloth to a clean reference cloth under bright light, ideally daylight, since warm interior bulbs can mask faint dye transfer. If a cloth shows any tint at all, treat it as a signal and adjust the method before scaling up.
Decision Table by Test Outcome
| Result | What It Means | Recommended Action |
|---|---|---|
| No transfer on any cloth | Stable dye across water, heat, and cleaner | Proceed with the planned method at normal dilution |
| Faint tint on cleaner cloth only | Cleaner is the trigger, not the water | Switch to a pH-neutral or WoolSafe-approved formula |
| Tint on hot-water cloth only | Temperature-sensitive dye | Use cold-water extraction or dry compound cleaning |
| Tint on plain water cloth | Highly fugitive dye, water alone releases color | Stop, blot dry, call an IICRC-certified technician |
| Heavy transfer on any cloth | Bleeding in progress, fibers at risk | Do not clean further, document and consult a pro |
Photograph every cloth against a white background with a timestamp. That single image trail is often the deciding factor in a successful warranty claim, and it costs you ten seconds per test.
What to Do When a Test Fails
A failed test is not a catastrophe if you move quickly, because fresh dye transfer is far easier to contain than dye that has dried into the pile. Blot the tested area with a dry white cloth, working from the outside of the spot inward so the bleeding does not spread into clean fibers. Avoid rubbing, which pushes loose dye deeper into the yarn.
Hold a fan or open a window to speed drying, since moisture keeps the dye mobile. Do not apply another cleaning product to neutralize the stain, because the next product is often the trigger that caused the transfer in the first place. Once the area is dry, photograph the spot, save the test cloths in a sealed bag, and contact an IICRC-certified technician with the documentation in hand. That record also protects any future warranty claim, since most manufacturers will not honor a complaint without evidence that pre-testing was attempted.
When Retesting Is Smarter Than Reusing Old Results
A carpet that passed a colorfastness test two years ago is not the same carpet today. Sun exposure slowly degrades dye bonds, repeated cleanings strip protective finishes, and even a furniture rearrangement can expose previously protected yarn to UV that was once filtered. A pass on file from 2022 means almost nothing in 2026, because the dye chemistry underfoot has changed even if the carpet looks identical.
Seasonal humidity shifts, a new water heater, or a switch in municipal water source can also change pH enough to nudge an unstable dye over the edge. Treat the test as a habit tied to each cleaning event, not a checkbox you tick once and forget.
Run the four tests again before every significant cleaning. Five minutes of prevention is worth more than a five-thousand-dollar replacement.
Bottom Line
The safest carpet is the one you tested five minutes ago. Run the rub, water, cleaner, and heat tests in a hidden spot, read the cloths under bright daylight, and match the result to a specific cleaning method. Document each test with a timestamped photo, retest before every major job, and call an IICRC-certified technician the moment heavy bleeding appears. Your carpet’s color is more fragile than it looks, and the only reliable proof of safety is the white cloth in your hand.
FAQ
What is colorfastness in carpet?
Colorfastness is a fiber’s ability to hold its dye when exposed to water, cleaning chemicals, heat, or friction. A colorfast carpet keeps its original color through normal cleaning, while a non-colorfast carpet releases dye into surrounding fibers, leaving permanent halos or blotches that rinsing cannot undo.
Why should I test carpet for colorfastness before cleaning?
Testing reveals whether the dye will bleed, crock, or migrate before a full cleaning locks the damage into the pile. A five-minute pre-test costs almost nothing and prevents the most expensive category of carpet mistake, where a single cleaning turns a stable rug into a re-dye or replacement project.
What supplies do I need to test carpet colorfastness?
You need a clean white cotton cloth, a small cup of lukewarm water, a second cup of water heated to roughly 140°F, the actual cleaning product you plan to use, and a camera or phone for documentation. Plain white cloth matters, because any print or optical brightener will contaminate the reading and produce a false positive.
Where on the carpet should I perform a colorfastness test?
Always test in a hidden area such as the back of a closet, under a heavy sofa, or behind a door, where foot traffic, pets, and direct sunlight rarely reach. Avoid spots with visible sun fade, because those fibers have already released some dye and will skew the result toward the alarmist side.
How do I do a wet colorfastness test on carpet?
Apply a few drops of plain lukewarm water to a hidden spot, wait ten to fifteen minutes, then blot firmly with a fresh white cloth. A clean cloth means the water alone is safe for that carpet, while any tint on the cloth signals that the dye is water-sensitive and full wet cleaning will cause bleeding.
How long should I wait after a colorfastness test before cleaning the full carpet?
Wait the full ten to fifteen minutes on each test, then add another five minutes for the area to fully dry before reviewing. Most technicians schedule the full cleaning within an hour of a passing result, because longer delays let humidity and temperature shift the dye’s behavior.